


How to setup WebdriverIO using Jasmine framework
WebdriverIO (WDIO) is an open-source testing automation framework. It can build both automate modern web and mobile applications. WDIO can be written in JavaScript and run on node.js.

What is WebdriverIO?
WebdriverIO (WDIO) is an open-source testing automation framework. It can build both automate modern web and mobile applications. WDIO can be written in JavaScript and run on node.js. The support for both Behavior Driven Development (BDD) and Test Driven Development (TDD) makes it a highly preferred choice for automation testers. The Latest version is 7V.
WebdriverIO official link: https://webdriver.io/docs/gettingstarted
How does WebdriverIO work?
WebdriverIO is built over NodeJS, which is an implementation of the JSON Wire Protocol. The WDIO package can install the key ‘npm i’ because of the NodeJS. It uses RESTful architecture to conduct automation testing.
The scripter can write a test script on JavaScript using the WebdriverIO(Wdio) library. Where the service request is sent via NodeJS as an HTTP command. It uses JSON Wire protocol, to connect the Selenium Standalone and the services module then forwards the request to the browser and the browser requests the test App. The below Architecture can explain the WDIO.
Why do we use WDIO?
WebdriverIO is an easy to use automation framework in both automated web applications (WebDriver/Chrome DevTools), mobile (Hybrid/Native) applications using Appium, and even Native desktop applications (Windows and macOS), using a custom configuration of Appium (mobile automation).
WebdriverIO can be easily integrated with a third-party testing solution. This makes it easy for the QA to leverage additional functions like recording tests, using real devices and browsers on the cloud, test reporting, etc.
Types of frameworks available in WebdriverIO:-
There are 3 types of Framework acts on the WebdriverIO. They are
- Mocha
- Jasmine
- Cucumber
Mocha
Mocha was introduced on 22 November 2011. Mocha Framework is run in nodeJS with the language of javascript. The frameworks make it easier to test asynchronous Javascript concepts in the browser. The Latest version of mocha is 8.4.0v.
Cucumber
Cucumber was introduced on 7 July 2018. The Cucumber is a testing tool that supports Behavior Driven Development (BDD). The cucumber framework uses the Ruby programming language. The Latest version of cucumber is 7.3.0v.
Jasmine Framework:-
In this project, we are going to use the Jasmine framework. Jasmine is an open-source testing framework for JavaScript. JASMINE was introduced on September 14, 2010, it was 11 years old.
It aims to run on any JavaScript-enabled platform, not intrude on the application or the IDE, and have easy-to-read syntax. It is heavily influenced by other unit testing frameworks, such as ScrewUnit, JSSpec, JSpec, and RSpec.The latest version is 7.20.7v.
Why do we need Jasmine framework?
Jasmine is famous for its JavaScript behavior-driven development(BDD) framework. Developers can easily test the unit test in this jasmine framework. It provides utilities that can be used to run automated tests for both synchronous and asynchronous code. Due to these reasons, we can also use this Jasmine framework for Automation testing.
The Basic requirements for the WebdriverIO framework
WebdriverIO can be run on the platform of the Latest Version of NodeJS and using the basic tool to install VS-Code from the official site. To set up the VScode in our local system. To create a new folder in our local system. Once after the successful installation please follow the below steps.
NodeJS official link: https://nodejs.org/en/
VS code Official link: https://code.visualstudio.com/download
- Open the CMD and check the version of the NodeJS with this command - node -v
- Create a new folder in your local system, right-click on the folder, and select OPEN with VScode, and open the terminal in the VScode.
How to SetUp the WebdriverIO for our project?
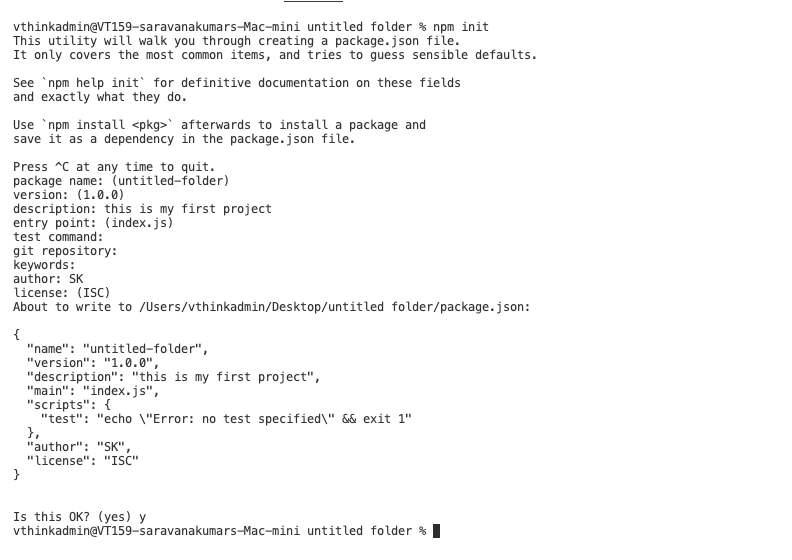
Step 1: To create the package.json setup to update project details using the terminal command - npm init
Step 2: To install the WDIO with this command line - npm install –save-dev @wdio/cli
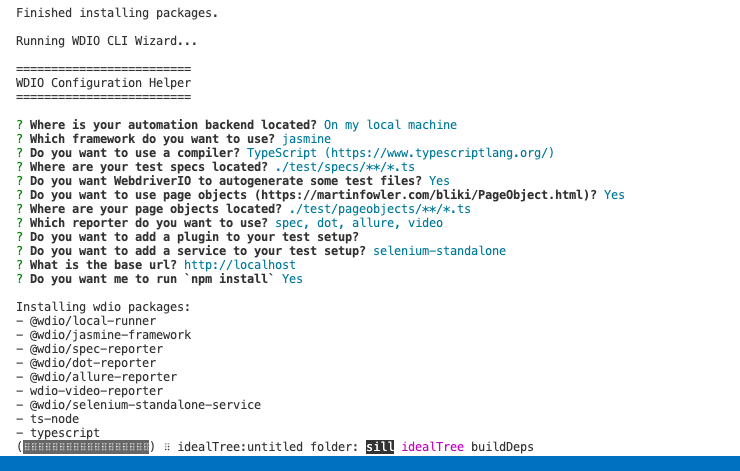
Step 3: To install the WDIO config with this command line - npx wdio config
Step 4: Select the on my local machine option.
Step 5: Select the Framework - Jasmine.
Step 6: Click the TypeScript(https:/www.typescript.org) option to Continue.
Step 7: Where are your test specs located? (./test/specs/**/*ts) just Enter it.
Step 8: Do you want WebdriverIO to auto-generate some test files? (Y/n) y.
Step 9: Do you want to use page objects (https://martinfowler.com/bliki/PageObject.html)? (Y/n) y.
Step 10: Where are your page objects located? (./test/pageobjects/**/*.ts) just Enter it.
Step 11: Select the reporter you want to use? spec, dot, allure, video.
Step 12: Do you want to add a plugin to your test setup? Don’t select anything, just Enter.
Step 13: Do you want to add a service to your test setup? select the selenium-standalone
Step 14: What is the base URL? (http://localhost) just Enter it.
Step 15: Do you want me to run `npm install` (Y/n)y.
Step 16: Finally we successfully configured the wdio.conf.ts file like below
Basic setup file and connect the root location in our project:
Step 1: Once we complete the above steps, we will get the basic login code with folder structure.
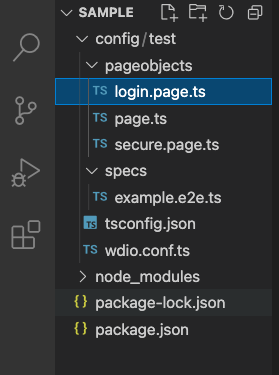
Step 2: Cut the tsconfig.json and wdio.conf.ts files and paste them below the package.json file

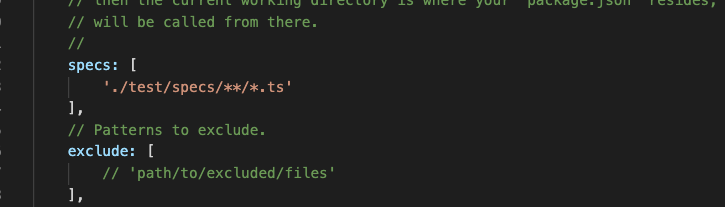
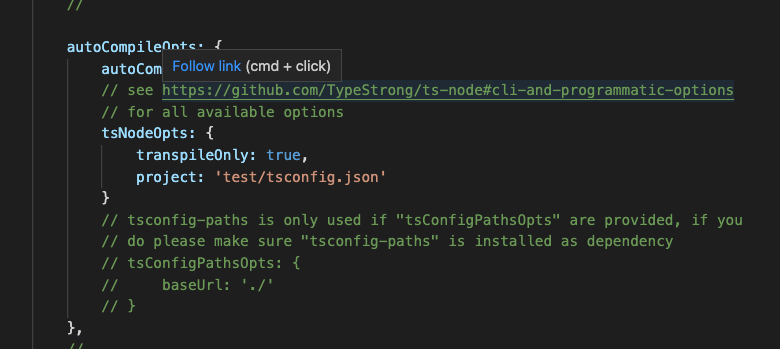
Step3: To set the tsconfig.ts file and spec file in the Root location in the wdio.conf.ts file:
- Before changing the root location the file configuration be like this.
- Once after changing the root location as per our customized folder structure

.png)
Step 4: Go to pageObjects folder – – →login.page.ts file give the action code for the test.
Step 5: Go to pageObjects folder – – →page.ts file to give URL code
Step 6: Go to pageObjects folder – – →secure.page.ts file is used to have an alert function
Step 7: Go to specs folder – – →example.e2e.ts file is written script function.
Step 8: To set up the run code command in package.json file
"scripts": {
"test": "npx wdio run ./wdio.conf.ts"
},
Step 9: Go to Terminal for running the script enter this command line:- npm run test
Step 10: Finally we get the result of our project in Dot-report and spec-report like this
What is Allure Reporter?
Allure Report is a flexible, lightweight multi-language test reporting tool in WebdriverIO. It provides clear Suites, and Graphical reports and allows everyone involved in the development process to extract the maximum of information from the everyday testing process. In our project allure reports can take a major role in Wdio. The latest version of the Allure report is 7.20.7 v.
Allure Report detail link : https://docs.qameta.io/allure/
Wdio Allure setup link ref: https://webdriver.io/docs/allure-reporter/
The Basic setup of the Allure Report in WDIO:
Step 1: To install the allure-report in terminal - npm install @wdio/allure-reporter
Step 2: To install the allure command line - npm i allure-commandline
Step 3: To set the allure-report in the root location in the wdio.conf.ts file
reporters: ['spec','dot',
[video, {
saveAllVideos: true,
videoSlowdownMultiplier: 3,
outputDir: './Reports/allure-results/',
}],
['allure', { outputDir: './Reports/allure-results/',
disableWebdriverStepsReporting: false,
disableWebdriverScreenshotsReporting: false,
}]],
Step 4: To set the screenshot in the root location in the wdio.conf.ts file
afterTest: async function(test, context,
{ error, result, duration, passed, retries }) {
const date = Date.now();
await browser.saveScreenshot
('./Reports/ScreenShots/Chrome-'+date+'.png');
if (!passed) {
await browser.takeScreenshot();
}else if(!error){
await browser.takeScreenshot();
}
},
Step 5: To set the running code of the script file in the package. JSON file
"scripts": {
"open-allure": "allure generate ./Reports/allure-results --clean && allure open",
"test": "npx wdio run ./wdio.conf.ts && npm run open-allure"
},
Report Generation in allure:
Step 1: The allure report can be generated with the command - allure generate ./Reports/allure-results --clean && allure open
Step 2: In another way of generating the allure-report in our project the above title, we set up the run code in package.json. - npm run open-allure (or ) npm run test
Step 3: Then finally stop the generation just click on CTRL+C.
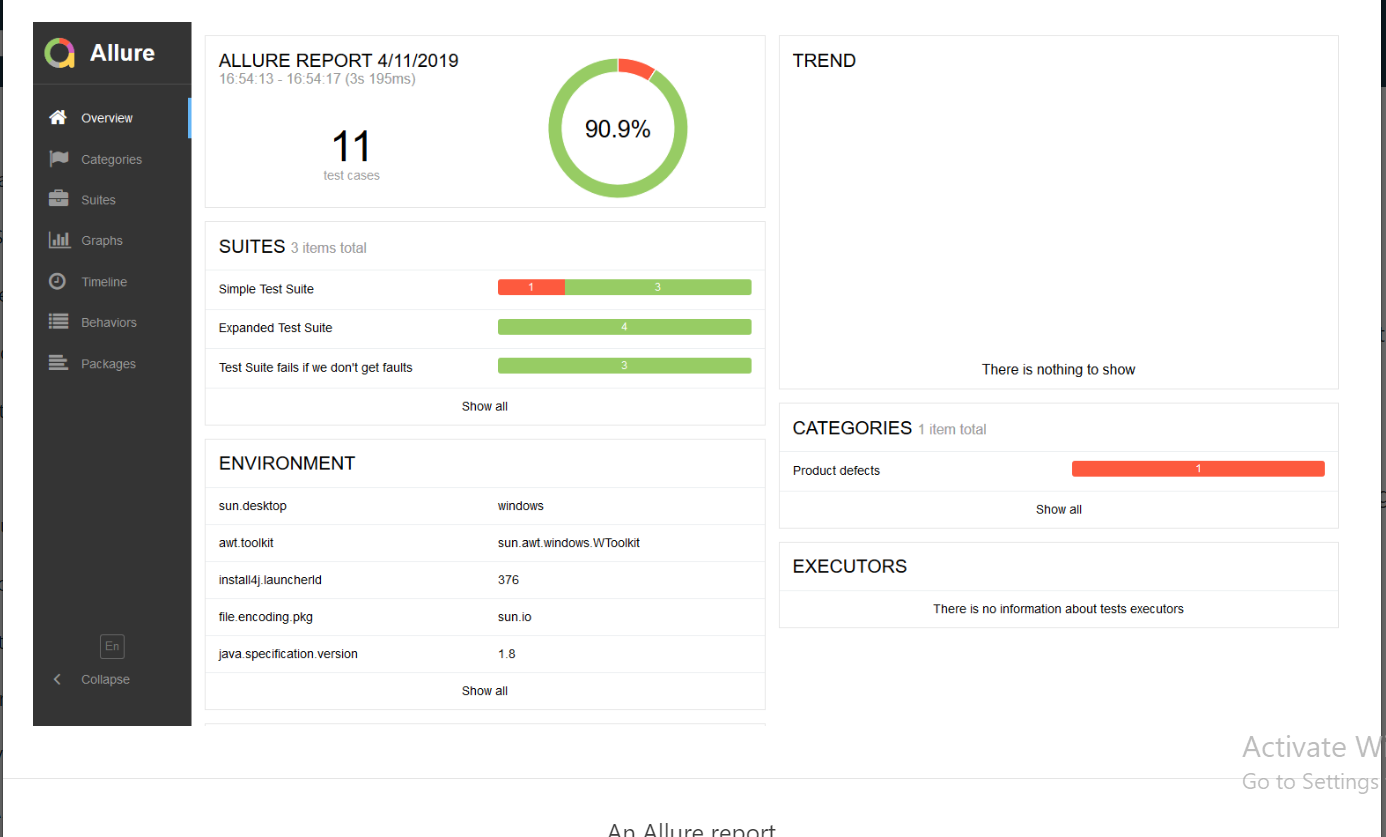
- Overview of allure-report generation: This tab can show all of the characteristics of basic report performance in one page like features,trends,execution and environment.
- Graphs: This tab allows you to see different statistics collected from the test data: statuses Failures or severity and duration diagrams.
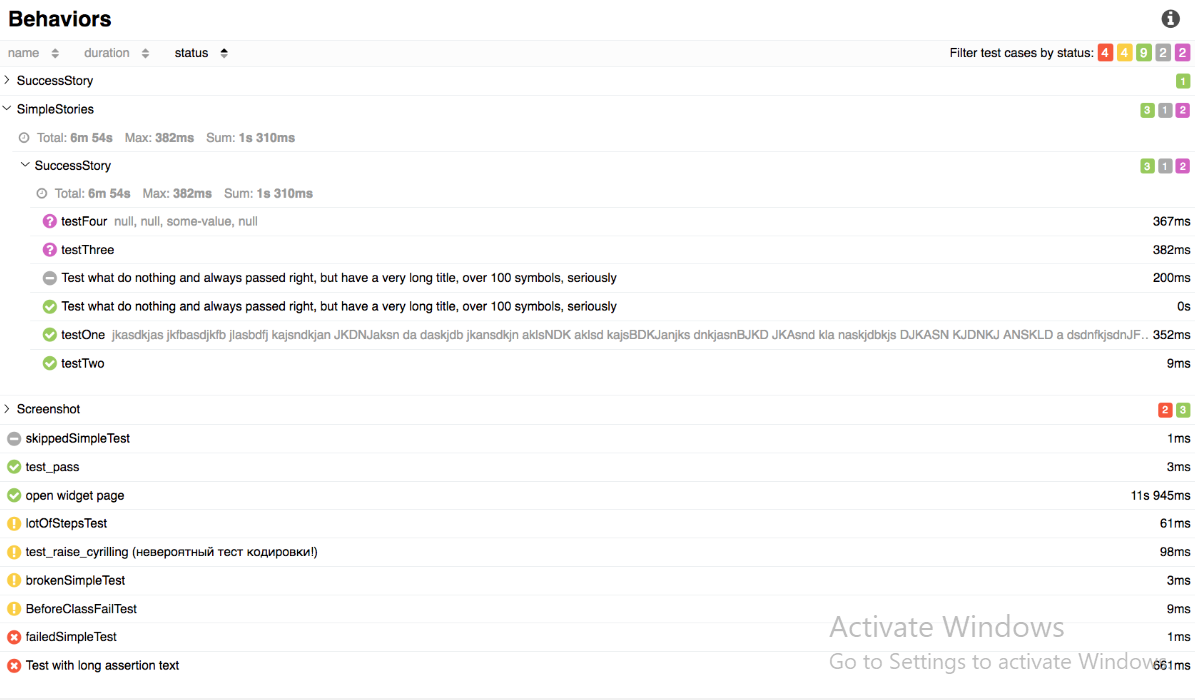
- Behaviors: This tab can perform the storage part. It can show these results in screenshots and video records.
- Categories: This tab gives you the way to create custom defects classification to apply for test results.
- Suites: This tab is a standard structural representation of executed tests, grouped by suites and classes can be found.
- TimeLine: This tab will show the result time when it passed and failed while generating the test case in the allure.
- Packages: This tab will represent a tree-like layout of test results, grouped by different packages.

Conclusion:
We hope you have found our end-to-end WebdriverIO framework tutorial to be useful as the WebdriverIO framework is an easy-to-understand open-source tool that provides a modular interface to build custom automation test cases based on your varying requirements.